Configure iSCSI with FreeNAS
Website Visitors:Before configuring the below steps, make sure you add some additional hard disk(I mean space) to your freenas machine.
-
Open a browser and login to FreeNAS 8.2.
-
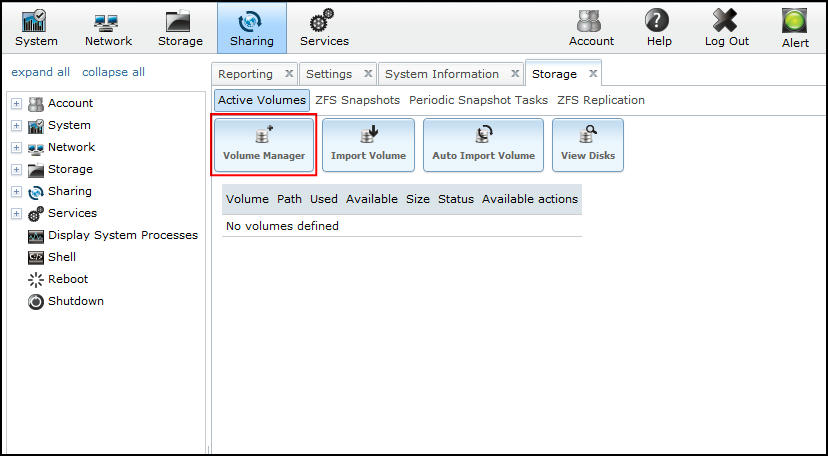
Navigate to Storage > Active Volumes:
-
Click Volume Manager.
-
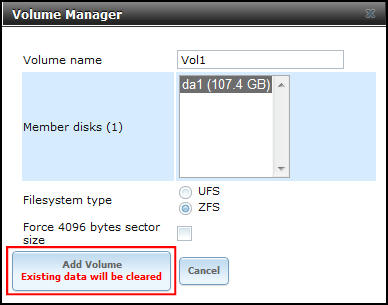
Enter a Volume Name, select disk(s), select Filesystem type (ZFS has some neat features), then click Add Volume:
-
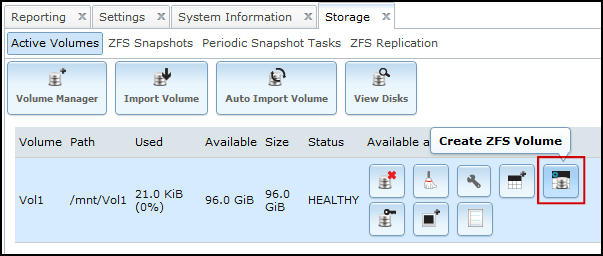
Click the Create ZFS Volume button:
-
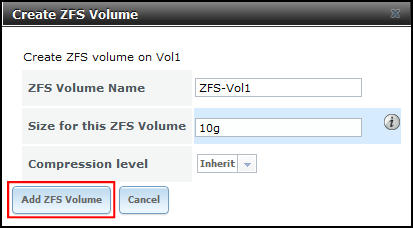
Enter a ZFS Volume Name, specify the volume size, then click Add ZFS Volume:
-
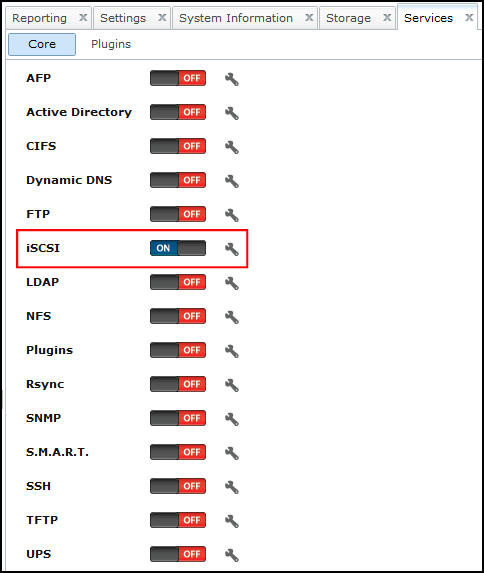
Navigate to Services > Core, and turn on iSCSI:
-
Click the wrench icon next to iSCSI.
-
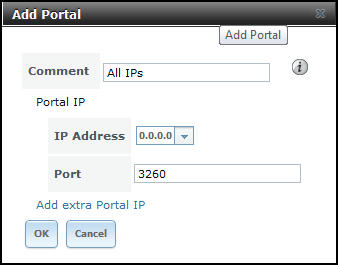
Navigate to iSCSI > Portals, click Add Portal. Select 0.0.0.0 as the IP Address (this means it will listen on all IPs).Click OK:
-
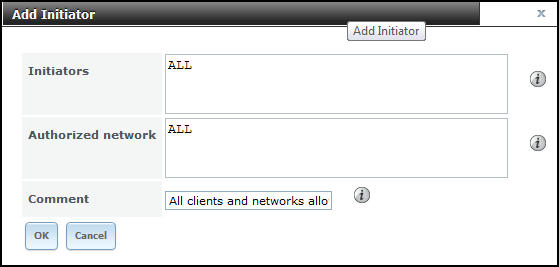
Navigate to iSCSI > Initiators, click Add Initiator. Leave ALL in both fields to allow all client connections from any network:
-
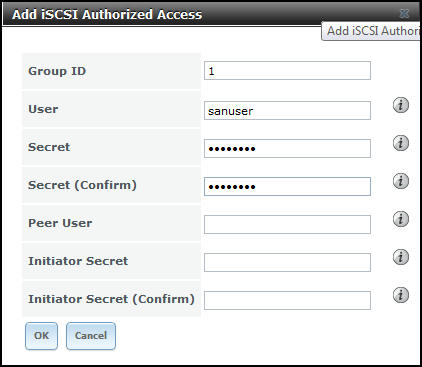
Navigate to iSCSI > Authorized Access, click Add iSCSI Authorized Access. Enter a Userand Secret:
-
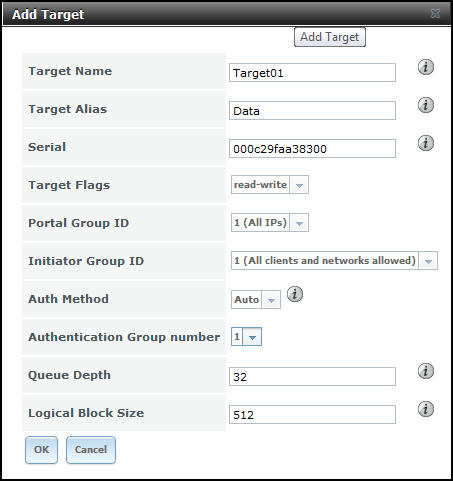
Navigate to iSCSI > Target, click Add Target. Enter a Target Name and Alias. Select thePortal and Initiator Group IDs, and Authentication Group number:
-
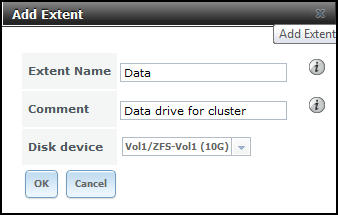
Navigate to iSCSI > Device Extents, click Add Extent. Enter an Extent Name and select aVolume:
-
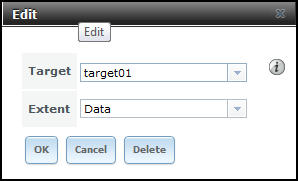
Navigate to iSCSI > Associated Targets, click Add Extent to Target. Select a Target andExtent to map together:
-
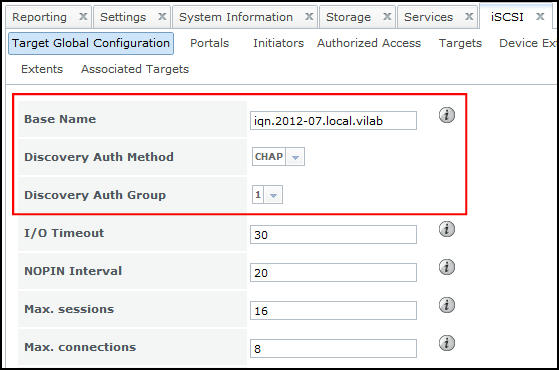
Navigate to iSCSI > Target Global Configuration. Customise your Base Name, select CHAPfor Discovery Auth Method and select your Discovery Auth Group. Leave other settings unless you know what you’re doing. Scroll to bottom of page to Save:
-
All done. Now you need to connect to the iSCSI SAN using an iSCSI Initiator.
-
If you get any connection problems, try restarting the iSCSI service here:

-
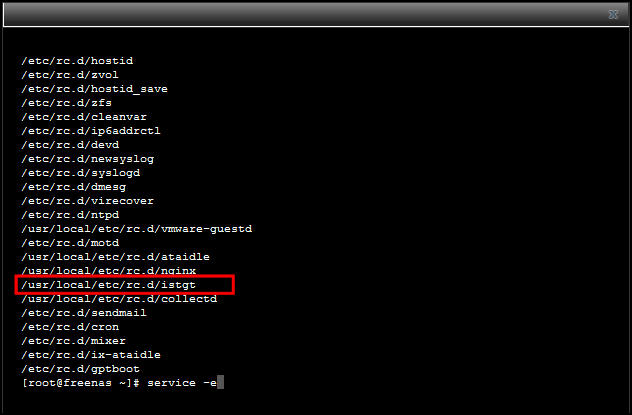
If you don’t trust the GUI and want to confirm the service has definitely started, you can runservice -e at the shell prompt, and look for istgt:
Want to learn more on Citrix Automations and solutions???
Subscribe to get our latest content by email.