Creating NetScaler "Custom" theme and solution for NetScaler GUI white page issue
Website Visitors:Mostly, all the companies that use Citrix NetScaler Gateway, want to customize their NetScaler Gateway URL, like changing the logo, background image, Titles, etc. All of this can be done with a theme and Citrix has a direct way of doing this, by creating something called a portal theme. You can go to this option by navigating to Netscaer – Citrix Gateway – Portal Themes. Create a theme, modify it as per your requirement and apply it to your NetScaler Gateway VIP.
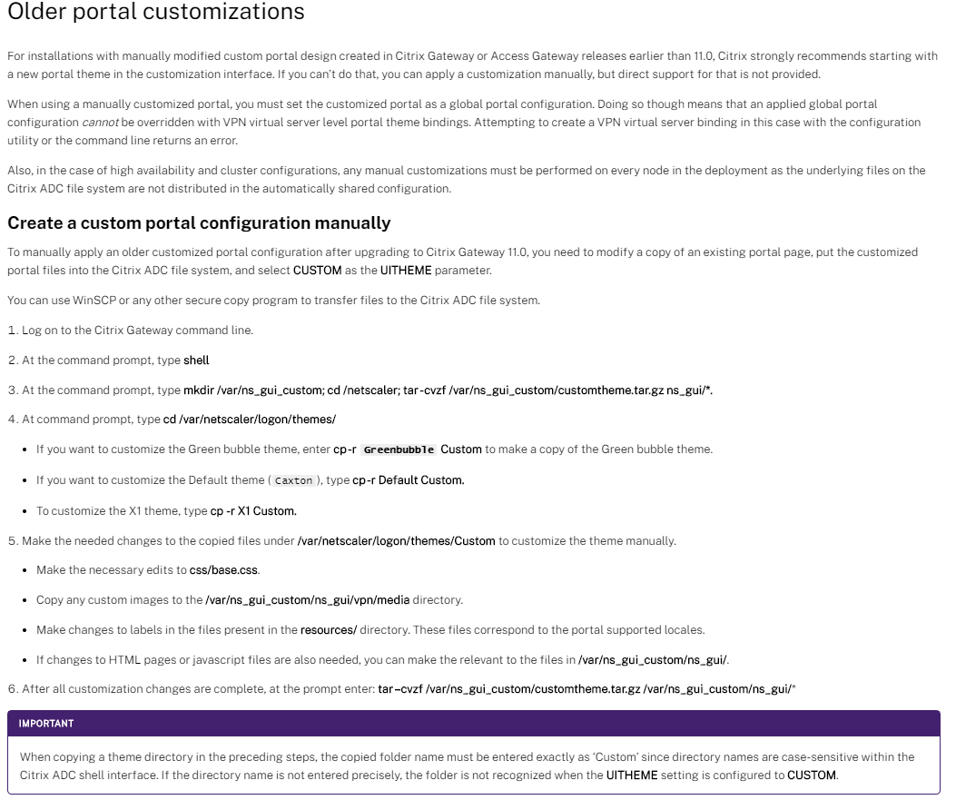
There is also another way to creating and selecting a theme called a “custom” theme. This is not supported by Citrix but we have this option. This will be useful if you have a web designer, they create a theme with CSS and HTML files and give it to you. You have to create folders on NetScaler and copy these files into that folder and run some commands to set that theme. Now Let’s look at the steps on how to create a “custom” theme in NetScaler.
-
Login to NetScaler via web browser and goto Citrix Gateway – Virtual Servers – edit your NetScaler Gateway VIP. Make sure there is no portal theme set to your VIP. If you have set anything, remove it and click Done at the bottom of the page.
-
Goto NetScaler (Citrix) Gateway – Global Settings – Change Global settings – Client Experience and set the UI Theme to Default. Click Ok at the bottom and click the save icon on the top right side. You can also login to putty and run “save config” command. This will set the current theme to NetScaler’s default theme (black theme).
-
Copy theme folder which contains custom theme files (CSS, Images and HTML files), from your local machine to /var/netscaler/gui/vpn folder on the NetScaler. Inside /var/netscaler/gui/vpn folder you should see your custom theme files (CSS, Images and HTML files).
-
Login to NetScaler via putty or WinSCP and Create New folder in /var with the name, ns_gui_custom: mkdir /var/ns_gui_custom
-
Copy the GUI folder from /var/netscaler to /var/ns_gui_custom folder via putty or winscp. cd /var/ns_gui_custom and cp -r /var/netscaler/gui /var/ns_gui_custom/
-
Rename the gui folder that you just copied to ns_gui. By now, folder structure will be /var/ns_gui_custom/ns_gui. This ns_gui folder will have admin_ui, EPA, VPN, VPNs folders. Admin_ui folder will have files and folders required to load the GUI admin portal when you connect to NSIP via the browser. VPN folder will have your custom CSS, images, and HTML files.
-
Login to NetScaler via putty and run these commands: cd /netscaler; tar -cvzf /var/ns_gui_custom/customtheme.tar.gz ns_gui/*. This will create /var/ns_gui_custom/customtheme.tar.gz file.
-
Next, goto the themes directory and copy any of the existing theme folder as shown below. Note that it should be named as Custom and is case sensitive. If you use any other word or as CUSTOM, it won’t work.
cd /var/netscaler/logon/themes/
cp -r Greenbubble Custom
- On putty terminal, run tar –cvzf /var/ns_gui_custom/customtheme.tar.gz /var/ns_gui_custom/ns_gui/* command.
- In your GUI browser, set theme to Custom in Citrix Gateway – Global Settings – Change Global settings – Client Experience – Set UI Theme to Custom. You should now see Custom in the dropdown.
- In an Incognito window, open your NetScaler Gateway URL and check the theme.

The issue with Admin Portal (NetScaler NSIP shows white page on the browser):
/var/netscaler/gui/admin_ui - folder will have files and folders required to load the GUI admin portal when you connect to NSIP via the browser. When you upgrade your firmware to the next version, files and folders in this admin_ui folder will be upgraded as this is a system folder, which is created by NetScaler.
We have created /var/ns_gui_custom folder ourselves and copied some custom files and the admin_ui folder there. They will not be upgraded after the firmware upgrade. So, After you set your theme to Custom in “client experience” tab as explained in above steps, you may see a white page on your admin GUI portal when connected via a browser. You may also see this issue after NetScaler is rebooted. So, you have to copy the admin_ui folder again. Follow below steps to do so:
Login to NetScaler via putty and execute the below commands in shell prompt.
- cd /var/ns_gui_custom/ns_gui
- _mv admin_ui admin_ui_old _ (or add a number and increment that number if you want to have that folder as backup, or you can delete it as well).
- cp -r /var/netscaler/gui/admin_ui /var/ns_gui_custom/ns_gui/
Now open the NetScaler’s NSIP from your browser and login. It should work. You don’t have to reboot your NetScaler when you do this.
Note that while you copy from putty, if you type /var/netscaler/gui/admi and press tab, it will show as admin_ui/. This will copy all the folders inside admin_ui to /var/ns_gui_custom/ns_gui. It wont copy admin_ui folder instead, it copies the contents inside the admin_ui folder. If you are familiar with linux, you will use tab completion for folder names. Make sure there is no / after admin_ui in cp-r command given above.
Want to learn more on Citrix Automations and solutions???
Subscribe to get our latest content by email.