Install Hugo, Create site and Host on github pages. Finally, Automate with github actions - Part 1
Website Visitors:Images by Susanne F, Clker-Free-Vector-Images from Pixabay, and my own customization.
I have used a few hosting websites like Hpage, wordpress.com, etc.. for a long time. But I wanted to host my website on something free and fast. I thought of using GitHub pages, but converting my WordPress site to Github pages was a very big task for me. I was looking for easy to use software to generate MD pages.
That’s where I’ve found Hugo.
Hugo is a very lightweight software to generate a static website of your own. It is developed in the Go language but you don’t need Go language to run this software.
My main requirement is to migrate from the WordPress site to the Hugo site and host it on Github pages. In this post, I am going to describe steps to create a Hugo site, add a theme, add it to GitHub pages, and optionally automate your website content update with GitHub actions. I will also describe migrating website from WordPress to Hugo.
Let’s start:
In this article, I am going to use the Hugo Site folder as c:\Hugo\Sites\Mysite and I am going to use a sample Theme called KeepIt
Install Hugo
There is no installation for Hugo. You have to download the exe directly and use it. To get the Hugo exe, you may use package management software like chocolatey or download the exe directly from their GitHub page https://github.com/gohugoio/hugo/releases.
For easy use, add Hugo’s exe path to environment variables.
Creating a Site in Hugo
To create a new site, open terminal, and type Hugo new site MySite (Assuming you have added Hugo exe path to environment variables). This will create a new Hugo site. You may go to the folder where you executed the command and see the Hugo site folders. In our case, it is c:\Hugo\Sites\Mysite\.

Adding a theme to Hugo site
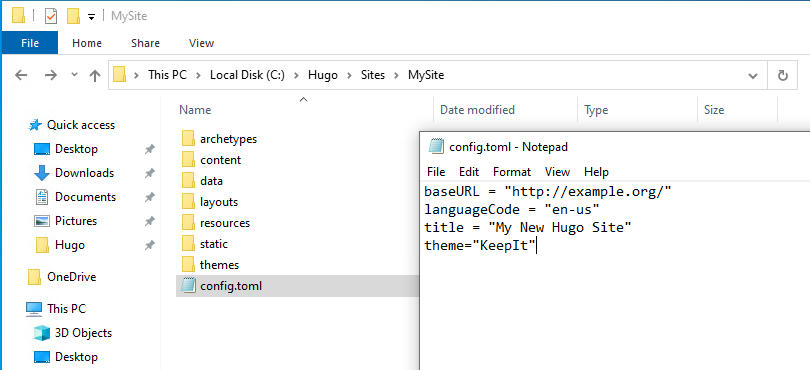
In order to use a theme, goto Hugo themes site, https://themes.gohugo.io/, and download a theme that you like. Move the theme folder that you just downloaded, to your Hugo site folder\themes directory like, c:\Hugo\Sites\Mysite\themes\. Now go to your Hugo site folder, c:\Hugo\Sites\Mysite, and edit config.toml file. Add ’theme = “themeName”’ (without single quotes) at end of config.toml file and save the file.
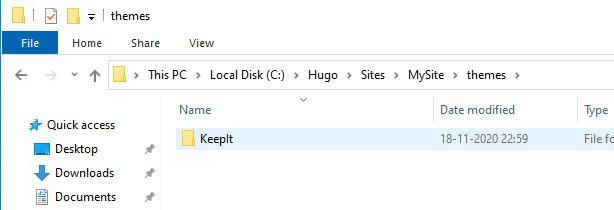
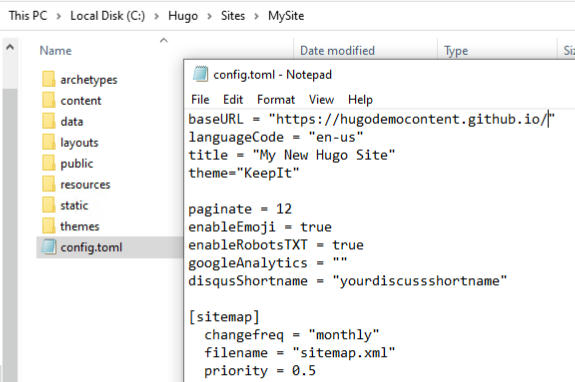
In my case, I have to add theme=“KeepIt” to config.toml file. For most of the themes, in your “site folder\themes\themeName” folder you will have “examplesite” folder where you have the default configuration of that theme. You can copy config.toml file from this folder to your site folder (C:\Hugo\Sites\MySite) and check how your website looks (explained in further steps). For now, enter theme=KeepIt to your config.toml file as shown below.
Preview your site
Now that we have created a site, and configured the theme for that site, let’s run the site locally and see how it looks. It will be empty as we did not create any posts yet. Open command prompt and goto c:\Hugo\Sites\Mysite folder. Type, hugo server -D command. This will start your Hugo server. Open your browser and type http://localhost:1313/. This will show your Hugo site running locally from your machine. -D parameter will show your draft posts also. If you have draft posts and want to see how it looks, use the -D parameter also.
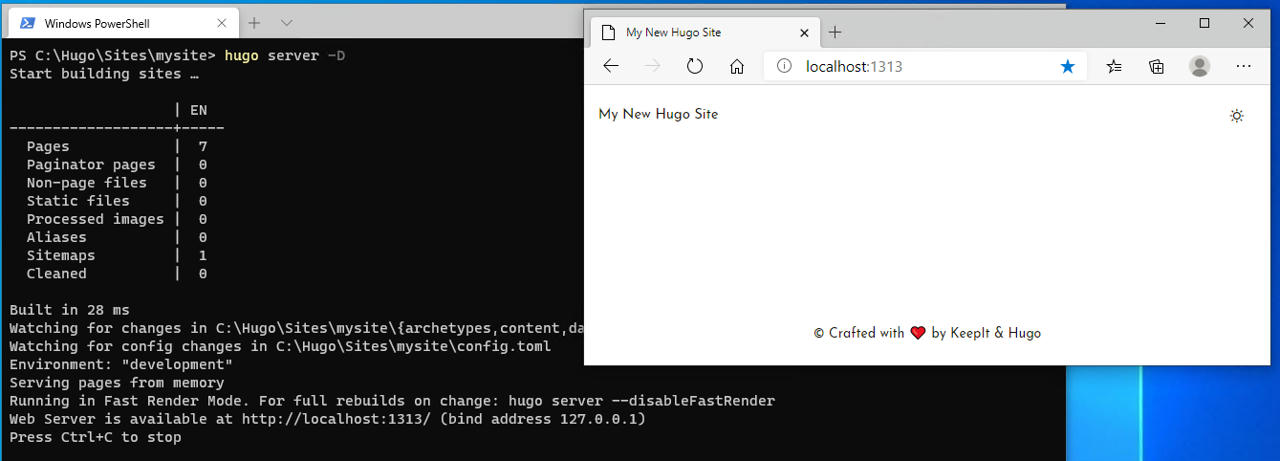
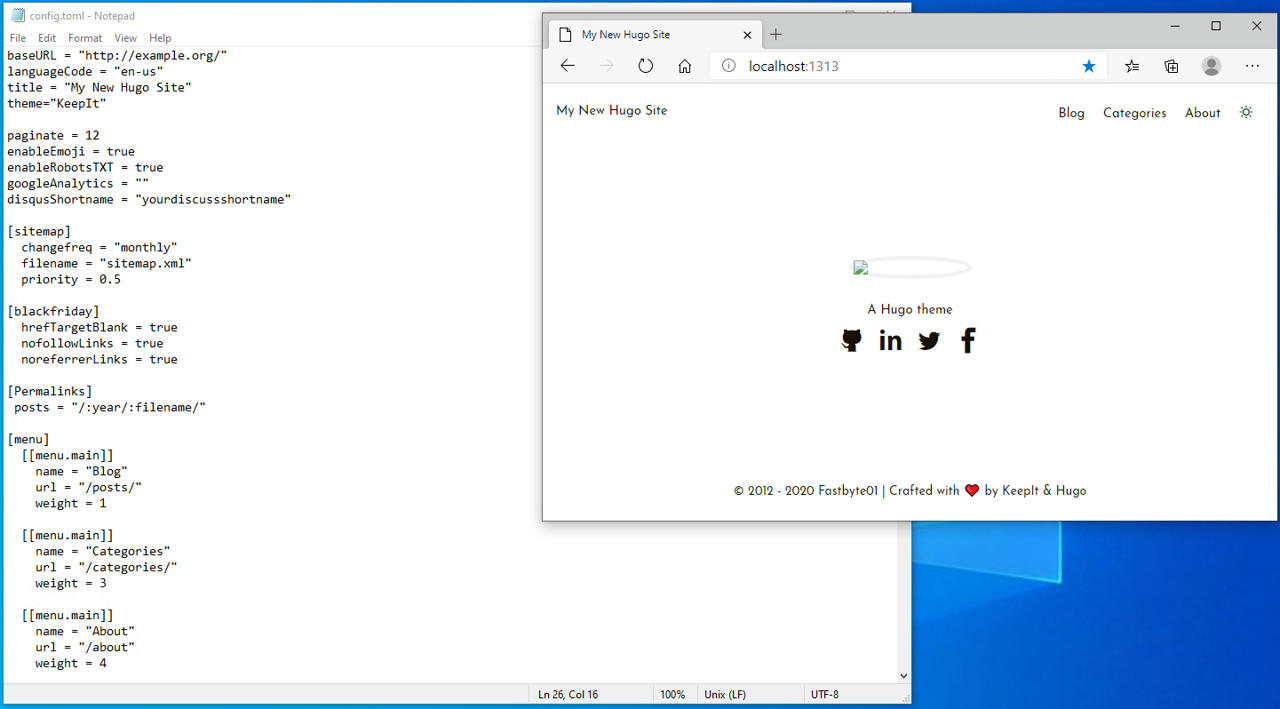
As explained earlier, there are no posts or content on the site, so it looks empty. If your site has drop-down menus or tags/categories to the right, you need to go through your theme documentation and update all those values in C:\Hugo\Sites\MySite\config.toml file. You may always go to examplesite folder in your theme folder to check for samples. I copied some content from C:\Hugo\Sites\MySite\themes\KeepIt\exampleSite\config.toml file and added it to C:\Hugo\Sites\MySite\config.toml file. After adding menu sections, my Hugo site looks like this. Now I can see Blog, Categories, About sections and some default text.
Create posts on your site
Goto your site folder in command prompt, c:\Hugo\Sites\Mysite. Use the command “Hugo new MyFirstPost.md”. This will create a new post in the c:\Hugo\Sites\Mysite\content folder. Modify the content as you like and change the “draft” value from true to false in your post. If you have tags or categories in your theme, use tags or categories as shown below in your MyFistPost.md file. Also, some themes do not support the posts which have the draft value set to true. So, make sure you change the value to false immediately after you create the post.
|
|
This will show your post under Tag1 and Category1 in your site. Again, your theme should support these tags and categories way. Make sure you download a theme that supports tags and categories.
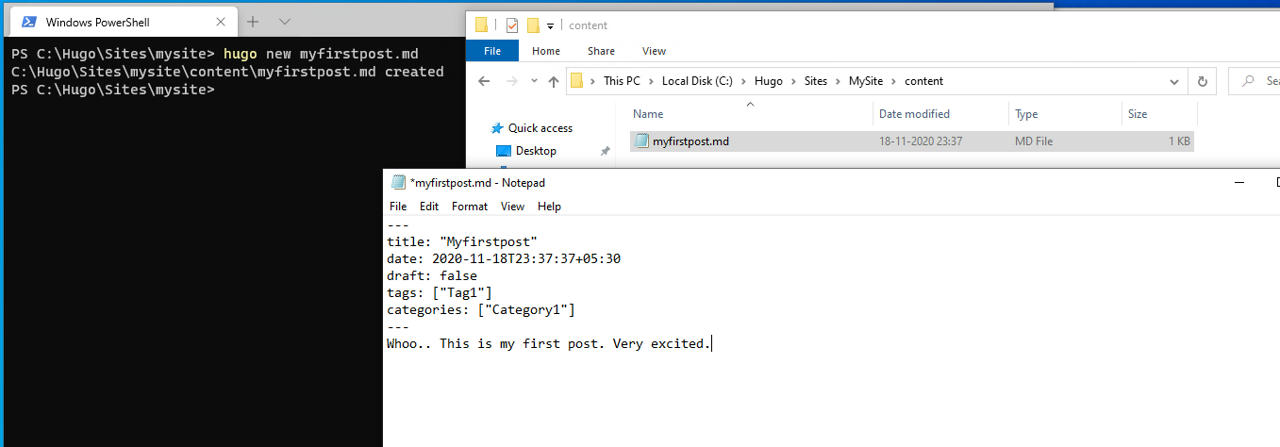
After adding above content (Save the file) open the command prompt, go to your site folder and type hugo server -D. In my case, the theme that I used, doesn’t support tags. So, tags are not shown on the page. But my first post is added to the category section and this is how it looks:
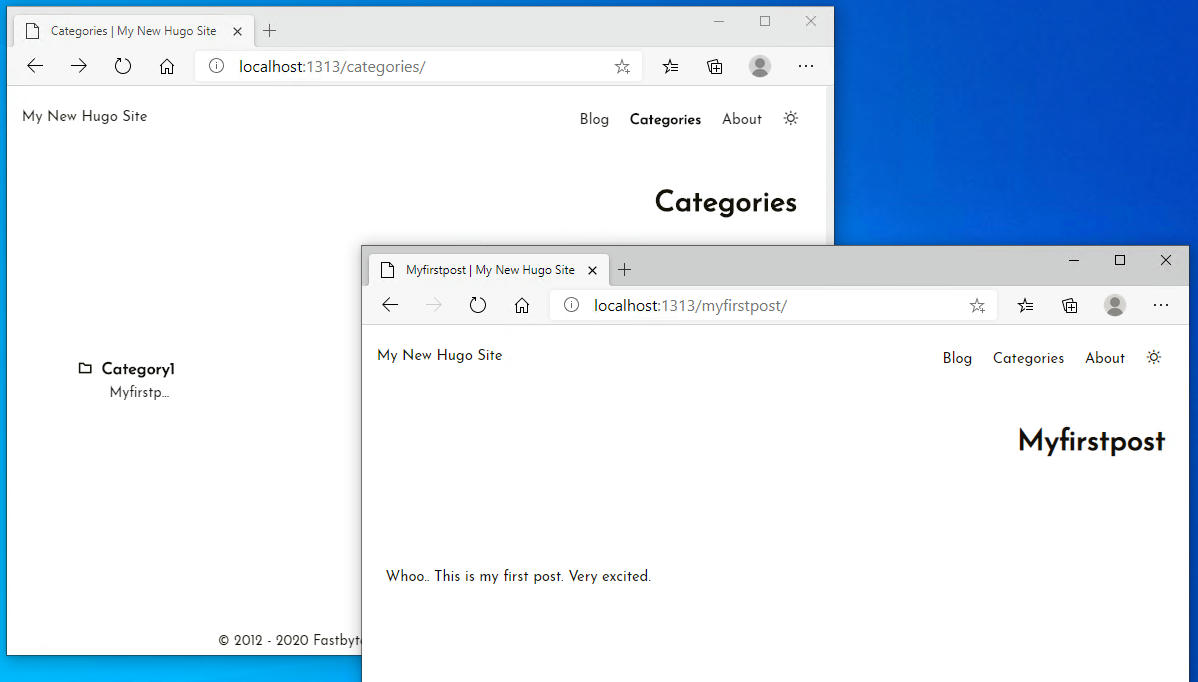
In this way, create new posts and add content inside those posts. Add categories so that all your posts are segregated in a nice manner.
One of the best features of Hugo is, you don’t have to stop the Hugo server to see your updated content. If you want to add or remove any content, you can do it while the Hugo server is running. After you save the files, You can see changes in your browser immediately. You don’t have to stop the server, make changes to the site, and start the server again. You can make changes while the Hugo server is running.
Publish your site for hosting
Your site is running successfully on your local server. If you want to host it on any hosting platform, you have to publish your site so that your site’s file structure is created properly.
Open config.toml file located in your site folder. In our case it is C:\Hugo\Sites\MySite\config.toml. Change baseURL value to your website name. As we are hosting on github pages, our website will be hugodemocontent.github.io (hugodemocontent is my repo name, which will be explained later in this article).
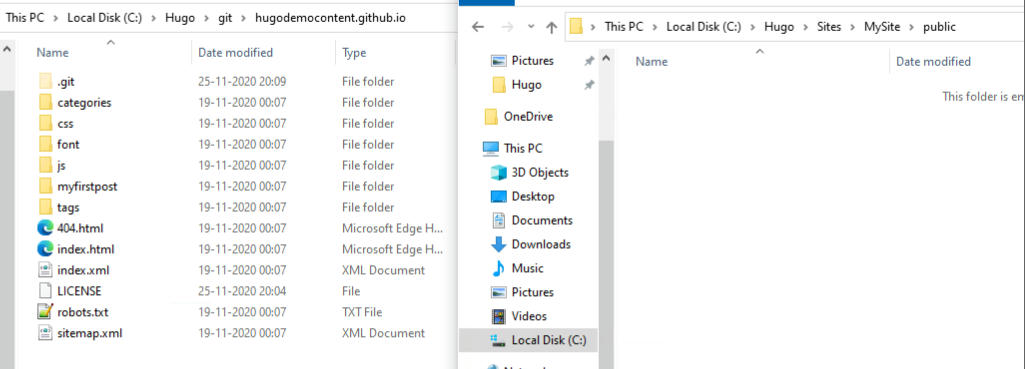
Open the command prompt, and go to your site folder, C:\Hugo\Sites\MySite and enter the command “hugo”. This will create a folder called public in your site folder, C:\Hugo\Sites\MySite. Hugo command will create your site with index.html and other HTML files so that you can use them directly in your hosting environments. Public folder content looks like as shown below. We need to copy this content to our hosting environment now. In our case, it is Github pages. Let’s jump to the GitHub page on the browser.

Create GitHub account
Go to github.com and create an account. Create a repository with the same name as your username as, “username.github.io”. In my case, my GitHub username is hugodemocontent. So, I have created the repository as hugodemocontent.github.io.

Copy all the files from c:\Hugo\Sites\Mysite\public folder to your new GitHub repository. Check Copy/upload Hugo site to GitHub section below to see how to copy files to GitHub account. Open your browser and type https://username.github.io. This should show the same website as you saw on your local machine but running from GitHub pages.
Congratulations… You have successfully created a site in Hugo and hosted it on Github pages.
Copy/upload local Hugo site to GitHub Account
To copy the whole Hugo site content to the GitHub account, you can use Git GUI apps. I use the GitHub desktop app. Login to your GitHub account in the GitHub GUI app. It will list all your repositories in your GitHub account and prompt you to choose a repo. Once you select a repo, choose a local folder where you want to save your git repo. Select a folder on your local hard disk. It will use that folder to sync your local changes to GitHub online account and vice versa. This is how it looks after logging into the GitHub desktop app and selecting hugodemocontent.github.io repo. I chose the local folder as c:\Hugo\git folder.

Once your site is modified ie., adding or removing posts, or making any changes to the site, run the Hugo command. This will generate static files in the public folder in your Hugo site folder like c:\Hugo\Sites\Mysite\public. Cut and paste all the files from c:\Hugo\Sites\MySite\public to your local GitHub repo folder as shown below. In my case it is c:\Hugo\git\hugodemocontent.github.io folder.
Now open the GitHub desktop app. It will show all the files that you just moved. Enter commit message and click commit to main option.
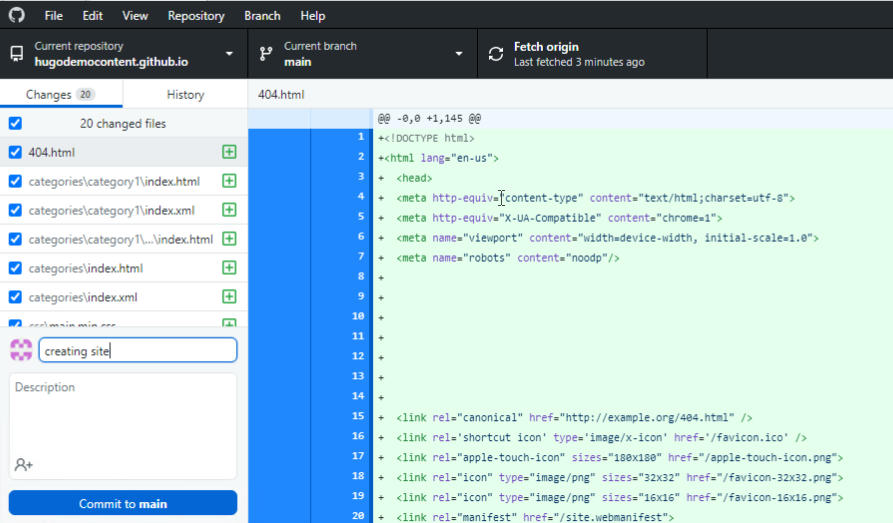
Now click push origin in the GitHub desktop app. It will push all these files to your GitHub account. Check the files in the github.com portal online.

Once done, open https://username.github.io to see all your changes. After you push the files, give it a min or two to reflect your changes.
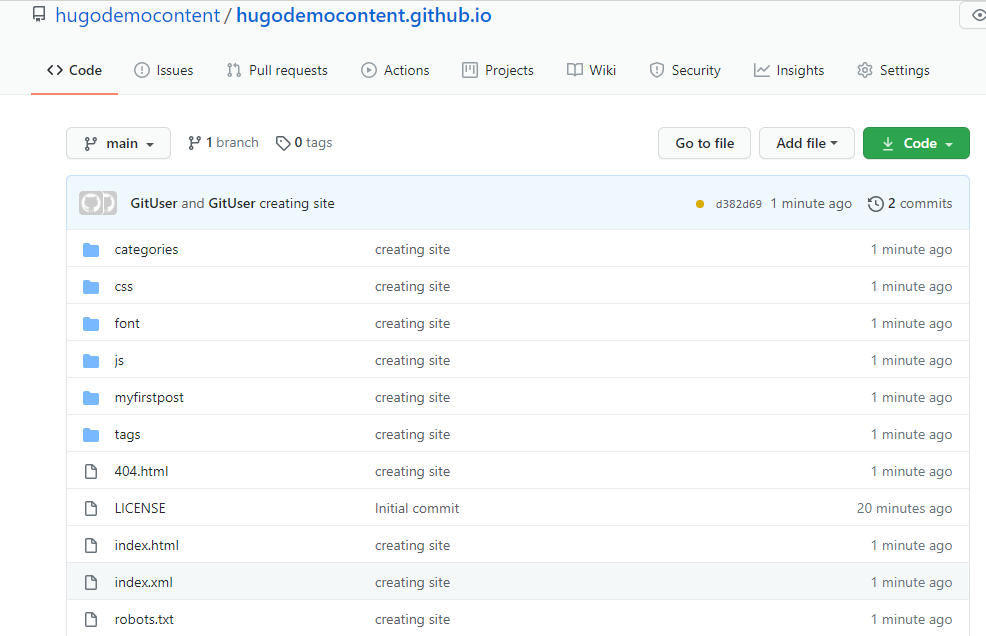
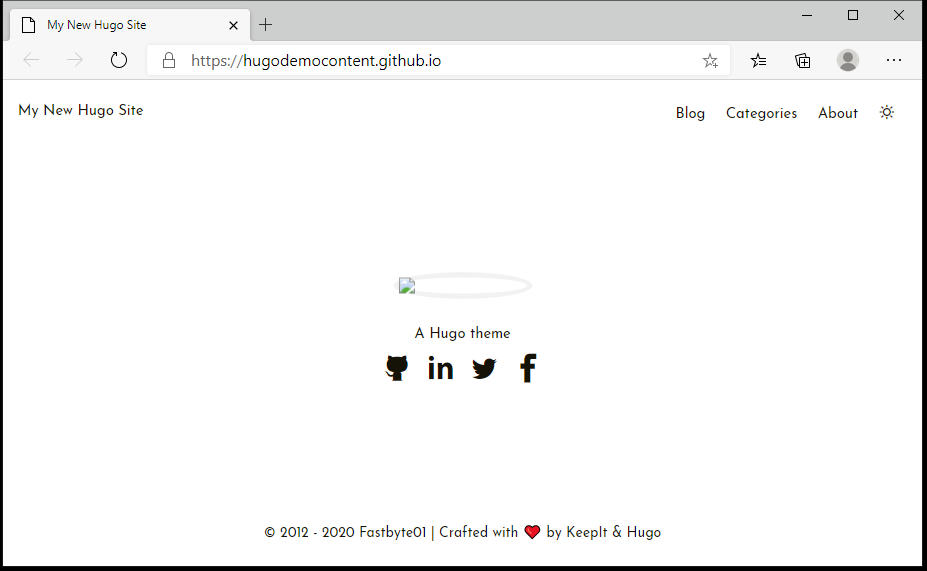
Finally, our updated site looks like this, running from GitHub pages:
Click on categories and click on the post. This is how it looks.
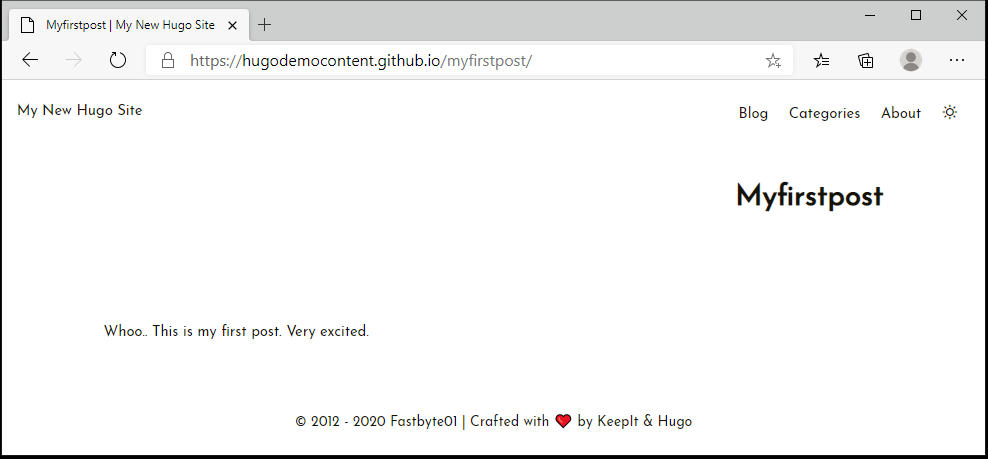
So far, we have created a site in Hugo and hosted it on Github pages.
Check out my part 2 post on How to continue with site content update, automating the process with GitHub Actions, and converting a WordPress site to Hugo. Click here for Part 2
Want to learn more on Citrix Automations and solutions???
Subscribe to get our latest content by email.