Install Hugo, Create site and Host on github pages. Finally, Automate with github actions - Part 2
Website Visitors:Images by Susanne F, Clker-Free-Vector-Images from Pixabay, and my own customization.
This is part 2 on Hugo site creation and hosting on GitHub pages. Check out part 1 of this deployment for better understanding.
How to continue with site content update
On your local machine, create new posts. Modify content and change draft value to false and use hugo server -D command to see the local version of your website. Make sure baseURL value is set to username.github.io. If everything works as expected, open the terminal and run Hugo command to create static files in the public folder. Copy everything to GitHub repo and open https://username.github.io. You should now see all the new posts that you created. You have to follow this process every time you need to create a new post or modify existing content.
Can we automate this process?
Yes. Using Github actions. With the process that we are following now, we need a machine with Hugo software installed and our whole Hugo site somewhere on the local disk. What if we do not have access to our Hugo machine? Let’s see how GitHub actions helps us in this case.
With GitHub actions, you don’t need your local server with you all the time.
GitHub Actions
GitHub Actions help you automate tasks within your software development life cycle. GitHub Actions are event-driven, meaning that you can run a series of commands after a specified event has occurred. For example, every time someone creates a pull request for a repository, you can automatically run a command that executes a software testing script.
Till How to continue section explained above, it is one of the ways to deploy local Hugo site to Github pages. Now, We are going to integrate our site with Github actions. This process is going to be a bit different. So, I have removed the repository (hugodemocontent.github.io) I created earlier and I am going to start from scratch.
Let’s see the steps to integrate Hugo with GitHub Actions:
Step 1: Create a repository in github.com with same your username <username>.github.io In my case, it will be hugodemocontent.github.io.
Step 2: Create another repository that will hold your website content for Hugo. This is the repo where we generate static files and copy them to our hugodemocontent.github.io repository. This is something like the Hugo site folder that you had on your local hard disk. Basically, the idea is, you install Hugo on your local server, create basic content, and push the content to this repository. From here, using a GitHub workflow, we run GitHub actions and get static content on the other repository which is hugodemocontent.github.io.
I will name this second repository MySourceCode. You can leave this MySourceCode repository as public or set it to private. I’d recommend setting it to private. If someone looks at your GitHub profile, they only see the username.github.io repository and nothing else.
Step 3: Add the same repository (MySourceCode) to your Github desktop GUI app as well. Steps as explained above.
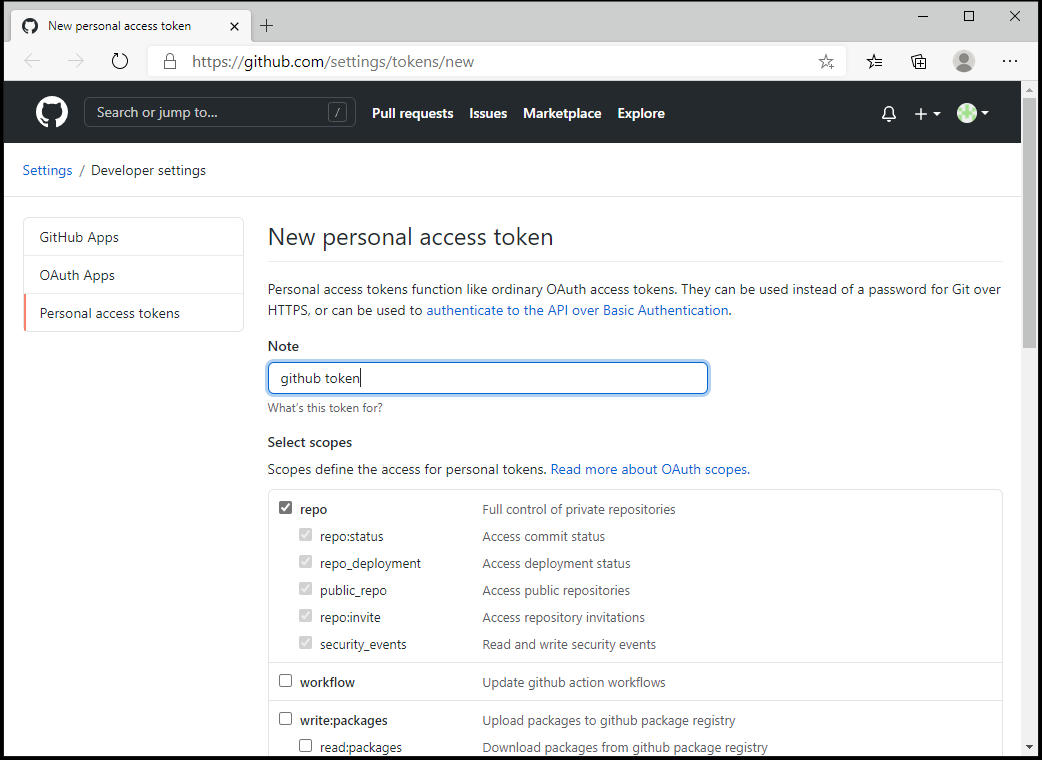
Step 4: Make sure you are already logged into github.com account in your browser. Navigate to https://github.com/settings/tokens/new url. This token is generated for your whole github account, not for any specific repository. Name it as “github token” and select repo options as shown below. At the bottom of the page, click generate token option. You will get a 40 character long token. Save it somewhere.
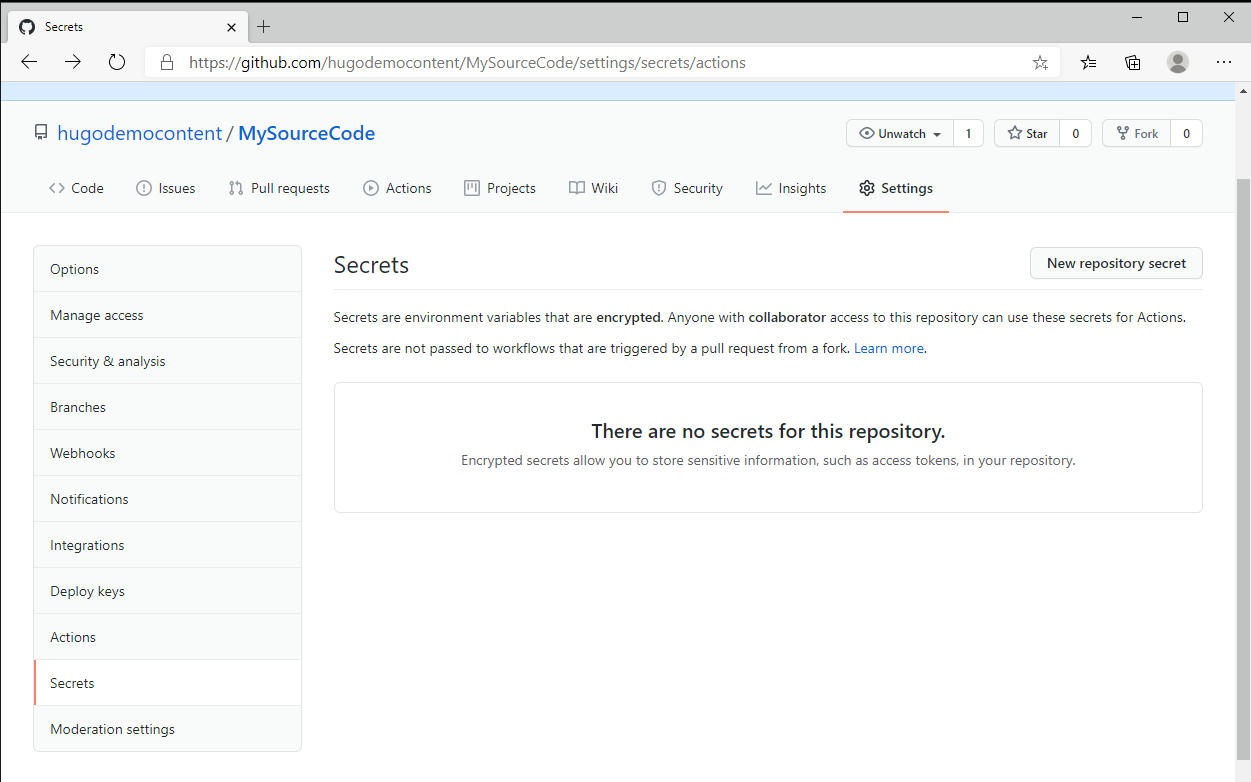
Step 5: Goto your GitHub account on the browser and open your repository created in step 2. In my case, it would be https://github.com/hugodemocontent/MySourceCode/settings/secrets. Click on “new repository secret”. Name your secret as TOKEN and paste the 40 character token in the value column and click the add secret option.
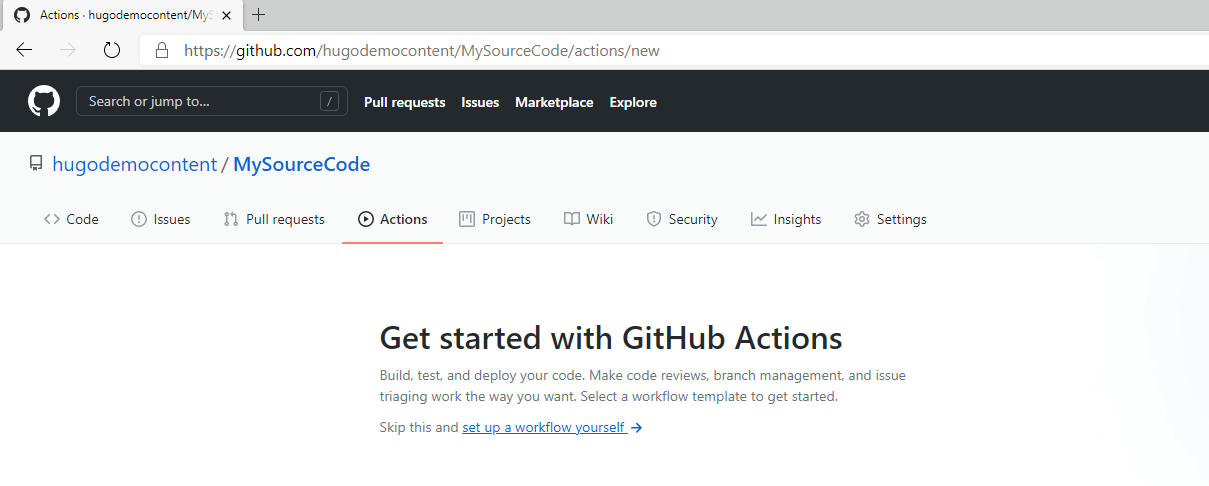
Step 6: Create a GitHub Action. Goto MySourceCode repository and click on the Actions tab. Next click on the “Set up a workflow yourself” link.
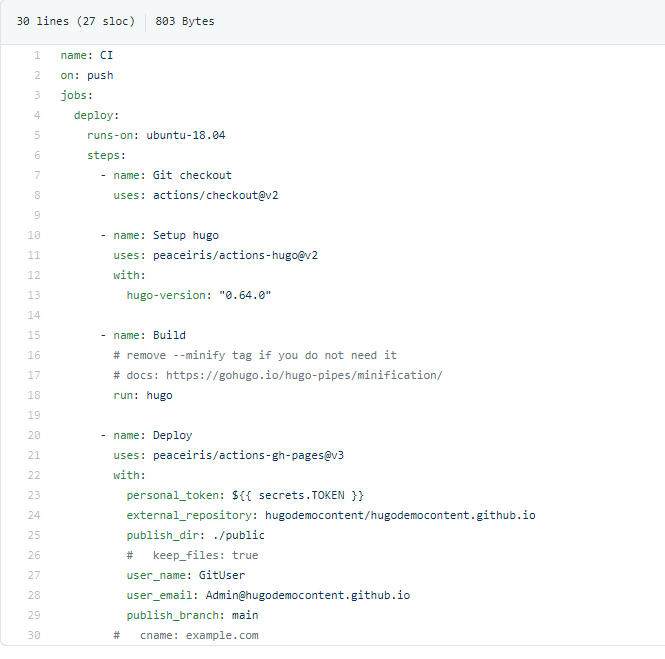
Default main.yml file will be opened. Remove everything and add the below content:
|
|
Here you need to change the external repository line and user_name, user_email lines. In step 5, if you have named your token something else, you have to update the same name under the personal_token line in the main.yml file. Click start commit once you update everything.
Step 7: As of now, there is nothing in the MySourceCode repository. Just a GitHub workflow file, main.yml is created.

Create a Hugo site locally on your local machine ie., on your hard disk. Add a theme, modify config.toml file and add posts and other pages. Run Hugo server -D to check if it is working as expected. Change draft value to false and change baseURL value. Using the GitHub desktop GUI app, copy the whole site to GitHub MySourceCode repository. Note that we are not running the Hugo command here. We need just the raw content of our site, which is default folders. When we upload this raw/basic Hugo content to MySourceCode repository, using the GitHub actions file we created earlier, GitHub actions will automatically run Hugo command, generate static content of our site, and copy it to our other repository, which is hugodemocontent.github.io.
In my case, I have my site content at C:\Hugo\Sites\MySite folder. I have to copy everything from this folder to C:\Hugo\github actions\MySourceCode folder.
Note: This is where the GitHub desktop app won’t recognize your themes folder if you’ve used git clone command. Even though you copy, paste all the folders from your local Hugo site folder to the git folder, the Github desktop app doesn’t recognize the themes folder as it already has .git and .github folders. So, remove these folders and try again if you used git clone command. I’ve directly downloaded the theme using “Download Zip” option. So, I don’t have this issue.
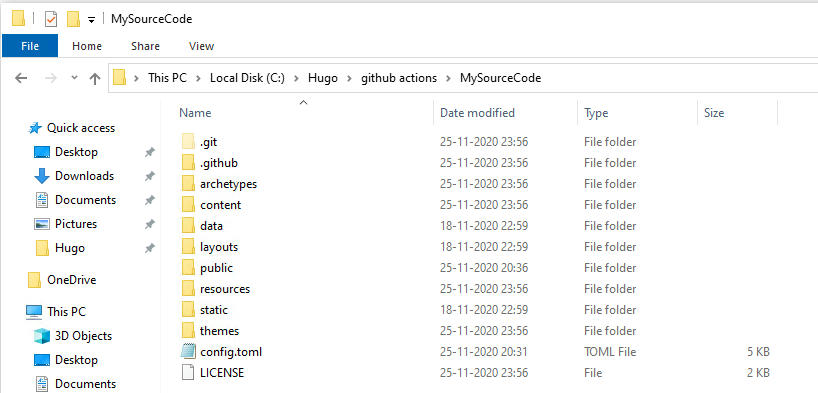
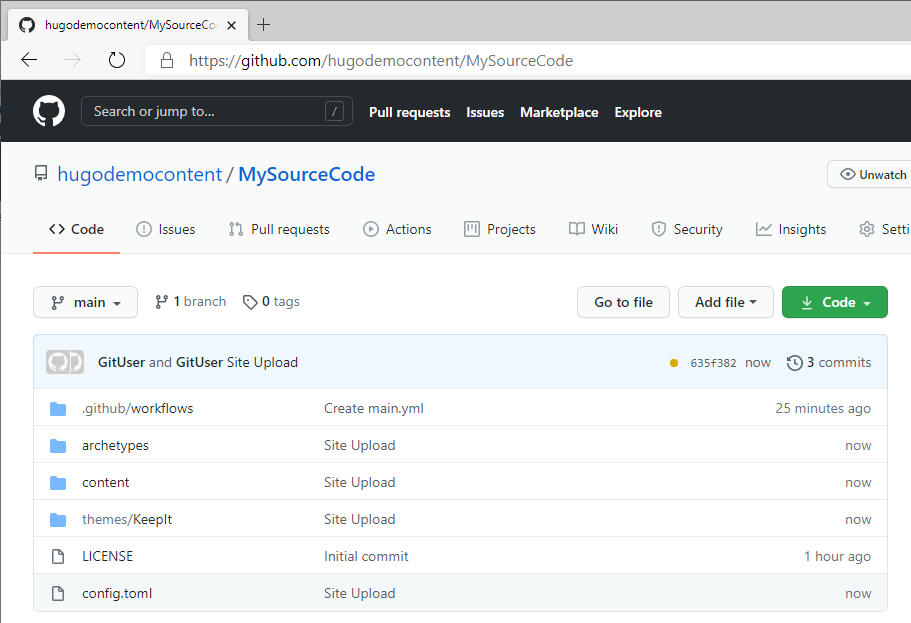
Now go to GitHub GUI desktop app, enter a summary, and click “commit to main” option. Next use push origin option and push all the files to MySourceCode folder in your GitHub account.
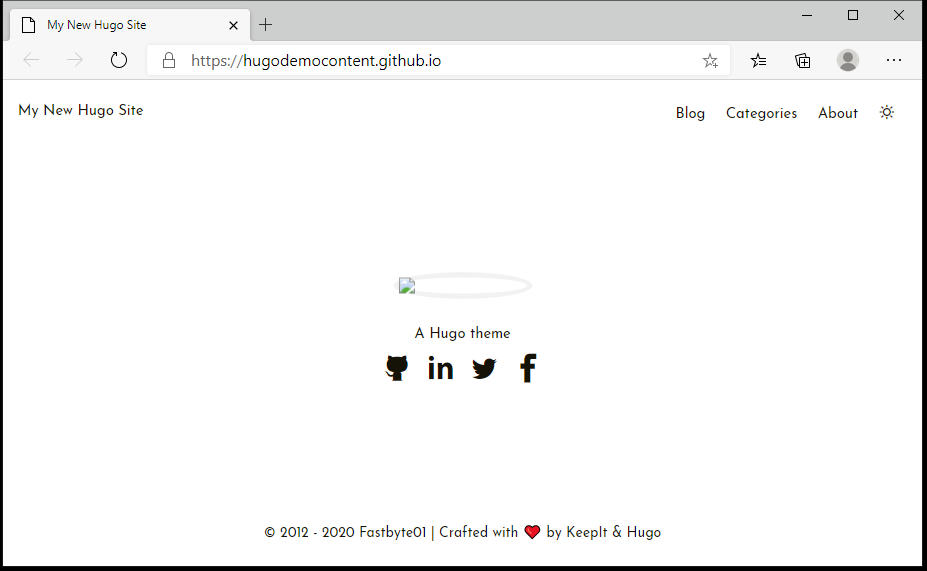
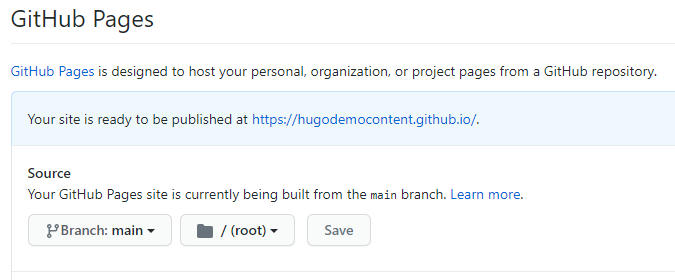
The moment content is added to MySourceCode repository, GitHub actions kick in automatically and Hugo command is executed. All static content is generated and populated to my Github pages site, https://hugodemocontent.github.io/. This is how my site looks after a refresh. Note that this may take a minute or two, as it should complete GitHub actions.
Step 8: All the configuration is done. I don’t need my local Hugo machine anymore. If I need to create a post, I have to goto MySourceCode repository, content folder, and create a file with .md extension. In my GitHub pages site, let me add about.md file. You can use online markdown editors to create and update your content. I use this Mark Down Editor. You are free to use whatever mark down editor you like. You just have to use the correct front matter when you create a post. Front matter means the default values created when creating an empty file like title, date, draft.
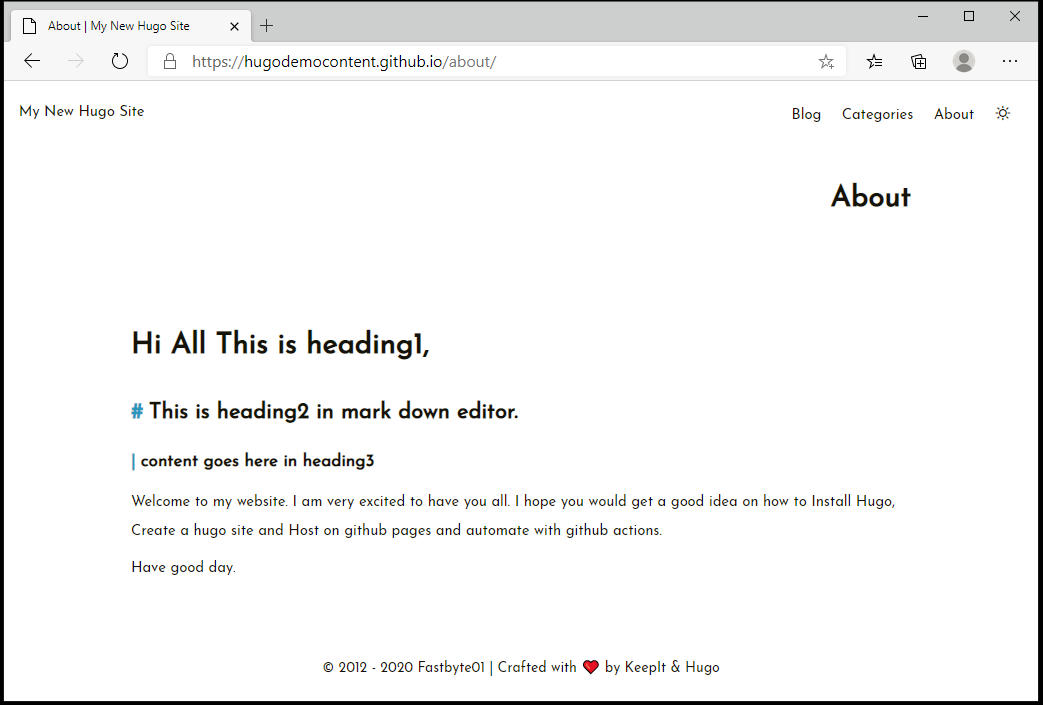
In MySourceCode repository, I have created a file called about.md in MySourceCode repository\content folder\ with below content.
|
|
Note that I am doing this completely on the GitHub MySourceCode repository from a browser. Not on my Hugo machine. Before, I created about.md file, this is how the about page looked on my site.

After I have created the file, we can see the GitHub actions task running automatically (orange color icon and a random number).

This is how my “about” page looks after a minute. I did not change anything. Just created a post in MySourceCode repository. It did the rest.
GitHub Actions content source: Ruddra.com
Different ways to host your site
- All the processes explained above till “How to continue” label in this site, is one way of deploying your site from local Hugo deployment to Github pages. You have to manually use the Hugo command and generate your site pages and push it to GitHub pages.
- Hugo has an article, on their official site: Host on GitHub | Hugo (gohugo.io) It explains about using a submodule for adding a theme and finally running a shell script. If you directly use the theme without any modifications or want to get any updates posted by the theme author in the future to your post, then you need to use submodule. I downloaded a theme and customized it. I do not need updates from the theme author in the future. So, I didn’t add submodule.
- Generate your site with the above-mentioned steps and automate whole new post/content creation with Github actions.
Out of all these 3 ways, I prefer option 3.
Export site from WordPress to Hugo
Scenario: I have a WordPress site with a lot of posts and pages, all segregated under a lot of categories. I want to migrate this site to a Github pages site with posts segregated under the same categories.
To migrate from WordPress to Hugo, you have to first export your site pages and posts to XML file. I would recommend exporting your posts/pages as per categories in your WordPress site. If you export all your posts/pages from WordPress, you will get a single XML file with all the posts and pages. When you convert it to MD files, you will get a long list of MD files. You won’t be able to identify/differentiate them as per categories.
This will be confusing and difficult to process if you have more number of categories. You need to add “categories: [“Category1”]” text to the MD files so that they can be segregated as per categories in your GitHub pages site. So, export posts/pages per category from your WordPress site. In your WordPress site, login to the admin portal and goto tools, export option. Next, click on the Posts radio button and select a category from the list of categories you had on the WordPress site.
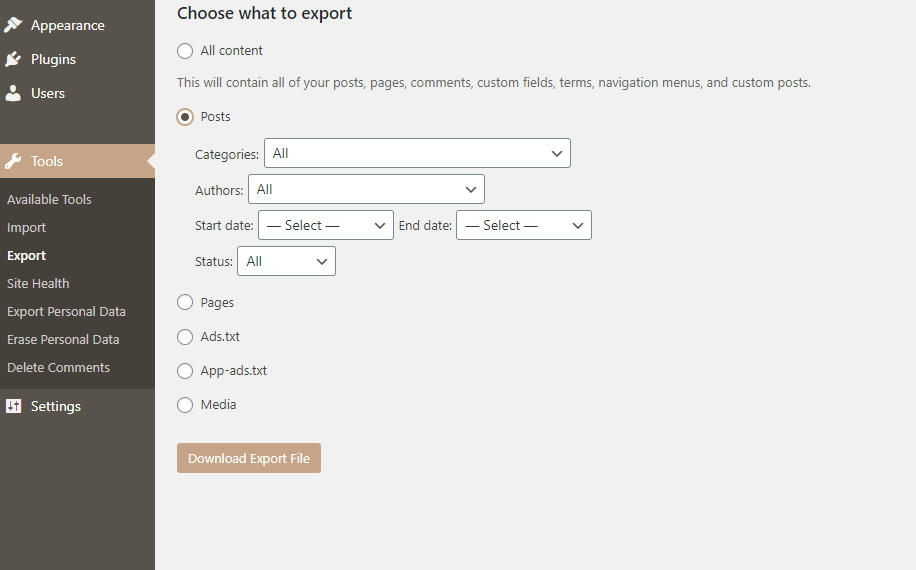
From the categories dropdown, select a category and click download export file. You will get an XML file that contains all posts in that category. Rename it as per your category name. Now we need to separate this single XML file into MD files as per posts in that file and also add categories: [“Category1”] to the file so that they can be added to the category section in your GitHub pages site.
Convert XML file to separate MD posts
Step 1: Go to https://github.com/lonekorean/wordpress-export-to-markdown, click on code, and download the zip file and extract contents to a folder. Install nodejs in your machine.
Step 2: Copy your XML file into the extracted folder and rename it as export.xml.
Step 3: Open the command prompt and change the directory to the folder you extracted in step 2. Run command, “node index.js”. This will ask questions on how whether or not you want prefix for your posts, or you need posts as per folder, etc… type yes or no.
Step 4: Wait for it to complete. Once done, go to the output folder in the same folder. You will see all your posts from the XML file. If you don’t want to segregate these posts into categories, you can directly upload these MD files to your MySourceCode folder in the GitHub repository. It will immediately run GitHub actions and add them to your Github pages site.
Your WordPress posts are now migrated to the GitHub pages site. You can stop here if you’d like. If you want to add these posts to categories, please continue.
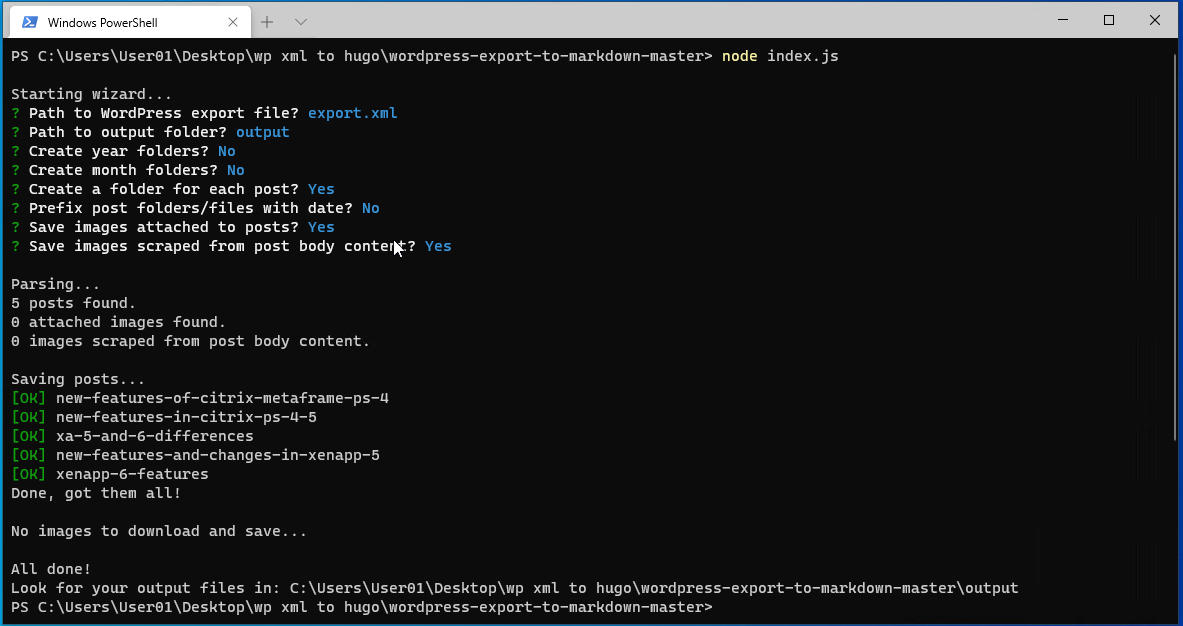
Output folder in the same directory will have folders as per my post names. As per the selection I made on Step 3, separate folders are created with post names and each folder contains an index.md file. Now we need to add “categories: [“Category1”]” text to these files so that they will be added to the category in the GitHub pages site.

This will add tags and categories text to all the md files. Next to show a featured image, it will capture a random image from unsplash and add it as featured image in your post.
|
|
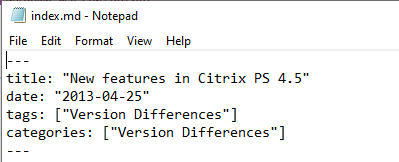
After I run the script, tags and categories are added to all the MD files in the output directory. Without this script, we have to manually open every MD file and add tags and categories content to it. This is how the MD file looks after running the script.
Now that I have everything ready, I need to upload these folders to the content folder in MySourceCode repository. It will run the GitHub actions and add them to my Github pages site.
I have copied all the folders under the output folder to C:\Hugo\github actions\MySourceCode\content. If you don’t have a local machine available, you can use the GitHub browser to do this but with GitHub desktop GUI, you can copy folders in bulk. After the migration is complete, you don’t need your local machine at all. Give it a commit message and click the “commit to main” option and push origin.
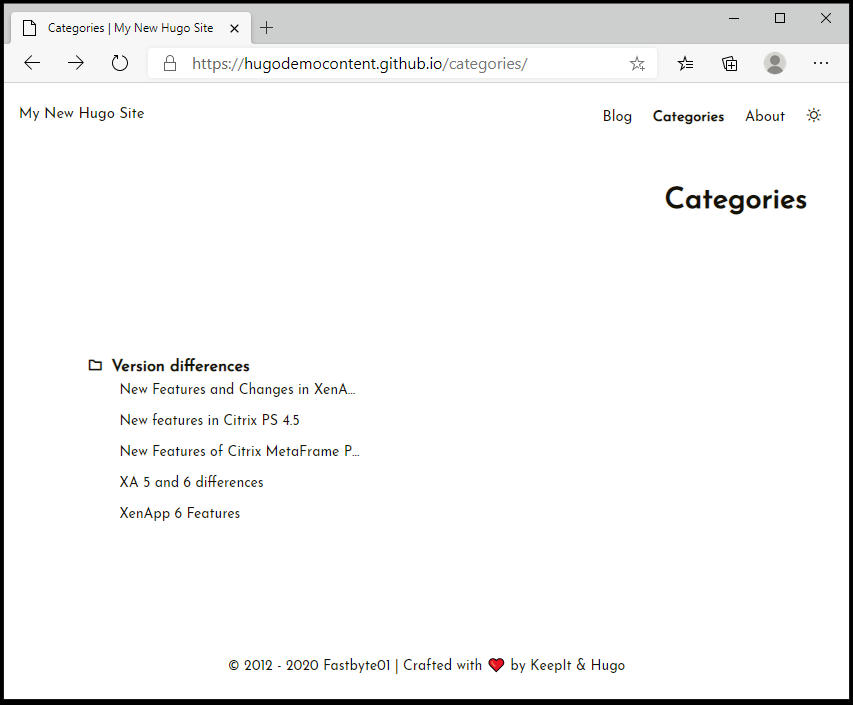
Immediately, GitHub actions are executed and my site categories are refreshed. As you can see a new category called “version differences” is created. This is because I have added categories: [“Version Differences”] to the files.
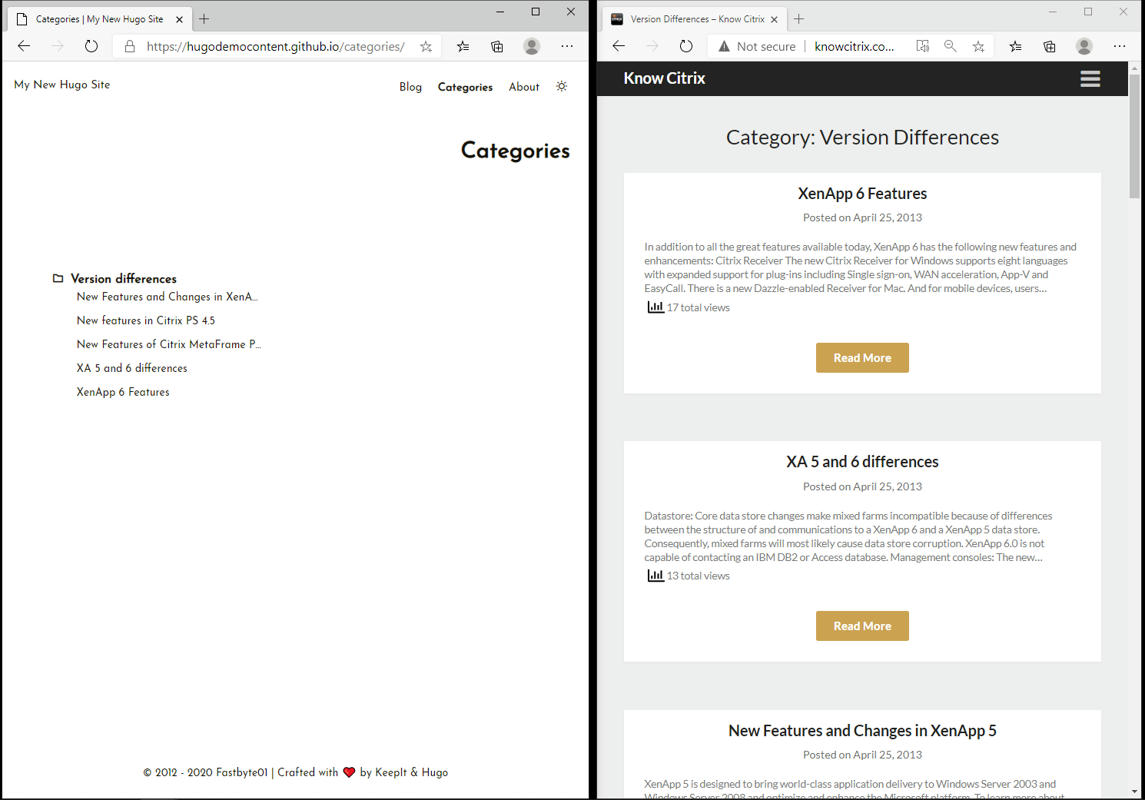
A quick comparison between two sites, one on GitHub pages and the other on WordPress.
You can leave your website as is, or buy a domain (like hugodemocontent.com) and redirect your website to that domain name. Check out more information here: Managing a custom domain for your GitHub Pages site - GitHub Docs
So, Finally, this is how you migrate the WordPress site to GitHub pages through Hugo. If you want to migrate your site or test it, you can create a test Github account and test it. You can delete that GitHub account later. That’s what I did in my case. For this demo, I’ve created a test Github account called hugodemocontent and deleted it.
Want to learn more on Citrix Automations and solutions???
Subscribe to get our latest content by email.